UsbPot Page
Contents
UsbPot Device


USB Digital Potentiometer
The UsbPot device is a USB controlled Digital Potentiometer, based on the Analog Devices AD5292 IC. The UsbPot can be supplied either boxed or unboxed for easy system integration.
Features include:
- 20kΩ digitally controlled potentiometer
- 1024 position wiper
- User programmable default wiper position
- 1,000V isolation
- Hot-pluggable connection performance achievable with Windows 7 and Windows 10 using the freely supplied UsbPot GUI software
Please consult the Eclectric website contact page for more information.
Software
UsbPot GUI application
A Graphical User Interface (GUI) software application is available for the UsbPot device, currently only supported for use on the following platforms:
- Windows 7, 64-bit or 32-bit
- Windows 10, 64-bit or 32-bit
The UsbPot GUI application provides a graphical user interface for simple interaction with the UsbPot device. The GUI application offers a stable 'hot-pluggable' USB serial port connection to the UsbPot device on Windows 7 and Windows 10. The application automatically displays a list of attached Eclectric USB devices. Once a serial port connection has been established with the device, the GUI application is connection failure resilient and able to automatically re-establish a connection, without the need to restart the application, if the UsbPot device is temporarily detached.

Direct download
The UsbPot GUI application installer package is available as a single Windows Installer (MSI) file, compatible with Windows 7 and Windows 10.
The latest version of the UsbPot GUI application software is available as a direct download from the Eclectric website software page.
Installation on Windows 7
System requirements:
- We recommend that your system is fully up to date
- Windows 7 Service Pack 1
- Microsoft .NET Framework 4.5
If the Microsoft .NET Framework 4.5 is not installed on your system you can download it here.
The UsbPot installer package includes a device driver for Windows 7 that is required for use with the GUI application and also for command line interaction using a serial port connection. During installation you will be prompted to install the unsigned device driver as shown in the installation image sequence below. Simply click yes to agree to install the driver or you will not be able to communicate with the UsbPot device.
An overview of the UsbPot GUI software installation procedure on Windows 7 follows:
Security warning
The Windows 7 'Security Warning' window will appear. This is because the installer package has not been digitally signed. The installer package is however malware free and perfectly safe! You may wish to verify this for yourself by passing the installer package MSI file through any malware scanner software. The online malware scanning service VirusTotal is a good option.
Click the [Run] button to proceed with the software installation.
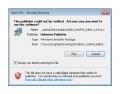
Security warning

Install wizard
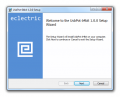
Welcome
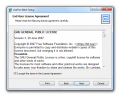
License
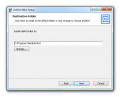
Install folder
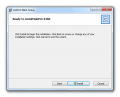
Ready


User Account Control (UAC)
Once again a warning will appear because the installer package has not been digitally signed. This is normal. Please click the [Yes] button to proceed with the installation.
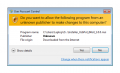
UAC basic

UAC details


Install device driver
When prompted, please accept the option 'Install this driver software anyway' to access the UsbPot device using a serial port connection
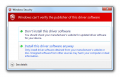
Device driver

Install completed
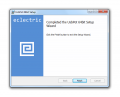
Completed

Installation on Windows 10
System requirements:
- We recommend that your system is fully up to date
- Microsoft .NET Framework 4.5 (should be installed by default)
The UsbPot installer package will install the GUI application software only. The UsbPot device is able to connect to Windows 10 as a virtual serial port without requiring a device driver from the software installation package. If you only wish to connect to the UsbPot device from Windows 10 using a Command Line Interface (CLI), Python script or Terminal Emulator (e.g PuTTY) then you do not need to install the GUI application.
An overview of the UsbPot GUI software installation procedure on Windows 10 follows:
SmartScreen
The Window 10 'SmartScreen' warning will appear. This is because the installer package has not been digitally signed. The installer package is however malware free and perfectly safe! You may wish to verify this for yourself by passing the installer package MSI file through any malware scanner. The online malware scanning service VirusTotal is a good option.
On the SmartScreen dialog box, click 'More info' to expose the [Run anyway] button and click to proceed with the installation.

SmartScreen1

SmartScreen2


Install wizard
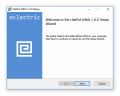
Welcome
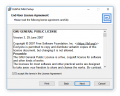
License
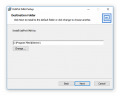
Install folder
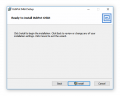
Ready


User Account Control (UAC)
Once again a warning will appear because the installer package has not been digitally signed. This is normal. Please click the [Yes] button to proceed with the installation.
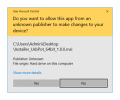
UAC basic

UAC details


Install completed
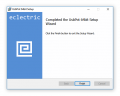
Completed

UsbPot GUI application operation
The UsbPot GUI application software, provided free of charge by Eclectric, is a Windows application providing a graphical user interface for simple interaction with the UsbPot device. The GUI application provides a stable 'hot-pluggable' USB serial port connection to the UsbPot device on Windows 7 and Windows 10. The application automatically scans and displays a list of attached Eclectric USB devices. Once a serial port connection has been established with the UsbPot device, the UsbPot GUI application is connection failure resilient and able to automatically re-connect without restarting the application if the UsbPot device is temporarily detached.
Graphical control of the Digital Potentiometer
The UsbPot GUI application will scan and display a list of the UsbPot devices currently attached to the system. Select a device from the dropdown list box and then click the [Open] button to open the connection to the UsbPot device.

Device settings
The Settings dialog box is a window that must be dismissed by clicking OK or Cancel (or Closing the window) before you can return to the main control window. The current version of the UsbPot GUI application software and executable architecture are displayed in the window Title. The following example shows version 1.0.0, running a 64-bit executable.

When a UsbPot device is attached to the system and a connection has been establish through the main control GUI window, the settings dialog will display the following information:
- Device firmware version
- Device name
The settings dialog also displays the current state of the AD5292's internal memory, which is used to provide the default wiper value at device power-up. The factory preset default wiper value is 512 i.e. mid-scale.
When no device is connected, the settings dialog content will be 'greyed out' and display blank information.
Device Name
It is possible to assign a unique name identity to your UsbPot device. This could be useful if you wish to use a number of UsbPot devices on your system and be able to easily identify each device. The name string can be up to 20 alphanumeric characters in length. Upon accepting the new name, the GUI software will briefly reset the UsbPot device and Windows will re-enumerate the device with a new USB 'SerialNumber' string corresponding to the device name, and will assign a new COM port number to the device. The UsbPot GUI software will re-establish a connection to the newly named device, without requiring the GUI application to restart.
Device Memory
20-TP RAM
The settings dialog also allows direct interaction with the AD5292's internal memory, which allows the potentiometer wiper value to be set with a user defined default value at device power-on. The AD5292 has a preset factory default wiper value of 512 i.e. mid-scale. Once a value has been written to the AD5292 memory, that value will be read and used as the new default wiper value when the device is first powered up. The AD5292 memory provides up to 20 addresses that are written to sequentially upon successful completion of a memory write operation.
The UsbPot device uses an AD5292 Digital Potentiometer IC with a 1024 tap 'wiper' used to select the resistance at Terminal3 between the total resistance between Terminal4 and Terminal2. The nominal resistance value between Terminal2 and Terminal4 is 20kΩ. When the wiper value is 0, then Terminal3 is at the same electrical potential as Terminal2.
The potentiometer wiper value will start at 'mid-position' at device power on i.e. 512.
The AD5292 device incorporates a 20-times programmable RAM (20-TP RAM) which allows the user setting of the default wiper value at device power on.
Command line operation
The UsbPot device enumerates on the USB bus as a Serial Port device, allowing direct control using your preferred command line interfacing technology on the Windows and Linux platforms. There now follows a discussion of the various ways that you can interact with the UsbPot device via the command line using Windows and Linux. See the UsbPot device Command summary for a comprehensive discussion of the available commands.
Note on implicit non-printable characters
The following non-printable characters are used throughout this technical summary.
[CR] = Carriage Return (normally sent when the ENTER or RETURN key is pressed)
[LF] = Line Feed
##   = Comment
Windows: device enumeration
The UsbPot device will enumerate as a USB virtual serial port device, i.e. a COM port.
## Example: Windows serial port device name
COM5
You can check your device's COM port number with Device Manager
## Windows 7 and Windows 10
Control Panel -> Administrative Tools -> Computer Management -> Device Manager -> Ports (COM & LPT)
Linux: device enumeration
On Linux, e.g. Ubuntu, the UsbPot device will enumerate as a USB virtual serial port device, i.e. a 'tty' device.
## Example: Linux serial port device name
/dev/ttyACM0
On Linux, e.g. Ubuntu, the following 'dmesg' trace is logged upon attaching a UsbPot device:
$ dmesg
...
usb 2-2: new full-speed USB device number 3 using uhci_hcd
usb 2-2: New USB device found, idVendor=16d0, idProduct=0dae
usb 2-2: New USB device strings: Mfr=1, Product=2, SerialNumber=3
usb 2-2: Product: Eclectric Serial Device
usb 2-2: Manufacturer: Eclectric
usb 2-2: SerialNumber: UsbPot
cdc_acm 2-2:1.0: ttyACM0: USB ACM device
usbcore: registered new interface driver cdc_acm
cdc_acm: USB Abstract Control Model driver for USB modems and ISDN adapters
...
Using standard shell commands
Direct interaction with the UsbPot can be achieved using the standard shell commands available using a terminal on Windows and Linux.
Windows
Direct interaction with the UsbPot device using the Windows cmd.exe terminal application.
Cmd.exe shell commands...
## NOTE: do not include a space between the echo string argument and the '>' redirection character
## (the echo command includes everything before the '>' redirection character)

## Enable control of the AD5292 wiper
C:\Users\username>echo "0x1803\r\n"> \\.\COM5

## Set the wiper to maximum (0x03FF logical OR 0x0400)
C:\Users\username>echo "0x07FF\r\n"> \\.\COM5
Linux
Direct interaction with the UsbPot device using a Linux terminal application, e.g. on Ubuntu, the gnome-terminal application.
Some initial tests...
## To remove the need to keep typing 'sudo' to access the serial port '/dev/ttyACM0'

## Verify that the device belongs to the 'dialout' group
$ ls -al /dev/ttyACM0
crw-rw---- 1 root dialout 166,0 Jun 24 10.58 /dev/ttyACM0

## Check which groups you are a part of
$ groups yourname

## Add yourname to the 'dialout' group'
$ sudo adduser yourname dialout

## you should now be a part of the 'dialout' group

## BONUS - On Linux you can read back the device response!

## FIRST: Open terminal1
## Send command: 'version'
$ echo -e "version\r\n" > /dev/ttyACM0

## SECOND: Open terminal2
## Display response from the serial port device
$ cat /dev/ttyACM0
version
UsbPotFW 1.0.6
UsbPot>
Bash shell commands...
## NOTE: using echo -e to allows inclusion of '\r' and '\n' backslash escape characters

## Enable control of the AD5292 wiper
$ echo -e "0x1803\r\n" > /dev/ttyACM0

## Set the wiper to maximum (0x03FF logical OR 0x0400)
$ echo -e "0x07FF\r\n" > /dev/ttyACM0
Python script
Excellent Python serial port interaction available through use of the 'pyserial' module. Documentation available here.
General Python script for serial port interaction
Copy and paste this example script into a text file and save as: serial_port.py
import serial

def main():
    port = "COM5"             ## Windows
    ##port = "/dev/ttyACM0"   ## Linux
    baud = 115200

    try:
        print("Attempting to open " + port + "...")
        ser = serial.Serial(port, baud, timeout=1)  # 1 second timeout for read

        # Open the serial port
        if ser.isOpen():
            print(ser.name + ' is open.')

        while True:
            cmd = input("Enter command or 'exit': ")        ## For Python 3
            ##cmd = raw_input("Enter command or 'exit': ")  ## For Python 2

            if cmd == 'exit':
                ser.close()
                return
            else:
                cmd_line = cmd + '\r\n'
                ser.write( cmd_line.encode('utf-8') )
                out = ser.read(256)
                out_str = out.decode('utf-8')
                print('Receiving...' + out_str)

    except Exception as e:
        e_str = str(e)
        print("Exception: " + e_str)
        print("Error: Serial port connection. Try again...")

    return

if __name__ == "__main__":
    ## Executes only if run as a script...
    print("START of script.")
    main()
    print("END of script.")
Windows
On Windows, use the python package manager 'pip' [todo]
Linux
On a Linux distribution, e.g. Ubuntu, the preferred method for installing the PySerial module is to use the system package manager e.g. 'apt'.
## Install PySerial module for Python 3
$ sudo apt install python3-serial

## Install PySerial module for Python 2
$ sudo apt install python-serial
To run the script:
## To run the script using Python 3 (preferred)
$ sudo python3 serial_port.py

## To run the script using Python 2
$ sudo python serial_port.py
Terminal Emulator
Connecting to the UsbPot device is possible using any Terminal Emulator software application capable of connecting to a serial port e.g. PuTTY on Windows, Minicom/Screen on Linux.
Default serial port connection parameters:
Speed (baud) N/A
Data bits    8
Stop bits    1
Parity       None
Flow control None
Default UsbPot device character stream 'server' behaviour:
ECHO=ON     ## Display echo of each character sent to the device
PROMPT=ON   ## Display prompt string (default prompt string = "UsbPot> ")
Windows
Connecting to the UsbPot device using the PuTTY Terminal Emulator. Simply setup a Serial Port connection to the current COM port number that Windows has assigned to the UsbPot (COM5 in the example shown). Press return on the terminal to receive a 'command prompt' and you can start to interact with the UsbPot device. See the UsbPot device Command summary for a more comprehensive discussion of the available commands.

Linux
Screen, minicom.
Command summary
General syntax and implicit non-printable characters
The following non-printable characters are used throughout this technical summary.
[CR] = Carriage Return (normally sent when the ENTER or RETURN key is pressed)
[LF] = Line Feed
##   = Comment

## Commands are case-insensitive, e.g.:
UsbPot> HELP
## ...is the same as...
UsbPot> help
Character stream format
## Query
command[CR][LF]      ## [LF] technically not required

## Response
response[CR][LF]
Help
## Command: HELP
## Params:  none | command | * | @

## Examples...

## Print list of available commands
UsbPot> help
[core] commands:
HELP      VERSION   ERASE     RESET
[user] commands:
NAME      ECHO      PROMPT

## Print information about the HELP command
UsbPot> help help
Help for <help>:
INFO: Command description or a list of the available commands
USAGE: help <none|command|*|@>  none=list, *=details, @=parameters

## Print details about each command
UsbPot> help *
[core] commands:
HELP            Command description or a list of the available commands
VERSION         Firmware version
ERASE           Erase device to default factory settings
RESET           Reset the USB device
[user] commands:
NAME            Device name: 20 alphanumeric characters max
ECHO            Echo on/off
PROMPT          Prompt on/off

## Print parameter information for each command
UsbPot> help @
[core] commands:
HELP            <none|command|*|@>  none=list, *=details, @=parameters
VERSION         <none>
ERASE           <none>
RESET           <none>
[user] commands:
NAME            <none|text>
ECHO            <none|on|off>
PROMPT          <none|on|off>
Version
## Command: VERSION
## Params:  none

## Examples...

## Print the current firmware version
UsbPot> version
UsbPotFW 1.0.6
Setting a unique name for the UsbPot device
If you have more than one UsbPot device, you may wish to identify each device on your system with a unique name. The name will be applied to the USB device 'SerialNumber' string during device enumeration and also appear in the command prompt string. Following a successful UsbPot device name change using the command prompt, the device will need to be re-enumerated on the USB bus. This will require you to detach and then re-attach the device to your system, or you can issue a RESET command at the command prompt. Note that Windows will assign a new COM port number to your device so you will need to close and restart your Virtual Terminal connection. The UsbPot GUI application can perform this task via the Settings dialog, and does not require a software restart.
## Command: NAME
## Params:  none | text

## Examples...

## Get current device name
UsbPot> name
NAME=UsbPot

## Set new device name (20 alphanumeric characters max)
UsbPot> name Bob
OK: name accepted!

## Following device name change, get current device name:
UsbPot> name
NAME=Bob (please RESET device to apply name change)

## Please restart the UsbPot device by either:
##  Detach then re-attach the UsbPot device
##  Issue a RESET command at the

## Following device Reset:
##  The device will be re-enumerated and appear in Device Manager with a different COM port number
##  The UsbPot device name will appear as part of the USB enumeration 'SerialNumber' string
##  The new device name will appear as the command prompt string

## Example after resetting device:
Bob> name
NAME=Bob
Other settings
## Command: ECHO
## Params:  none | on | off

## Examples...

## Get current ECHO state
UsbPot> echo
ECHO=ON

## Enable echo of received characters
UsbPot> echo on
ECHO=ON

## Disable echo of received characters
UsbPot> echo off
ECHO=OFF
## Command: PROMPT
## Params:  none | on | off

## Examples...

## Get current PROMPT state
UsbPot> prompt
PROMPT=ON

## Enable display of the command prompt string
UsbPot> prompt on
PROMPT=ON

## Disable display of the the command prompt string
UsbPot> prompt off
PROMPT=OFF
Direct control of the AD5292 Digital Potentiometer
## AD5292 command format:

## Where: 0xNNNN is a 16-bit integer string, containing *upto* 4 hexadecimal characters [0-9, A-F]

## Query
0xNNNN[CR][LF]       ## [LF] technically not required

## Response
0xNNNN[CR][LF]
## Firstly, enable control of the potentiometer wiper
UsbPot> 0x1803
0x1803

## Get the current 10-bit wiper position value...
##   Wiper value range (get):
##   0x0000 <--> (0x0200) <--> 0x03FF
UsbPot> 0x0800
0x0200

## Set the current 10-bit wiper position value...
##   Note: must logically OR 0x0400 with the required value
##   Wiper value range (set):
##   0x0400 <--> (0x0600) <--> 0x07FF
UsbPot> 0x7FF
0x07FF
AD5292 Digital Potentiometer
Main features of the AD5292 digital potentiometer include:
- Single-channel, 1024-position resolution
- 20 kΩ, (50 kΩ, and 100 kΩ optonal) nominal resistance
- Maximum ±1% nominal resistor tolerance error
- 20-times programmable wiper memory
- Rheostat mode temperature coefficient: 35 ppm/°C
- Voltage divider temperature coefficient: 5 ppm/°C
Please refer to the Analog Devices AD5292 datasheet for more comprehensive information, available here.
Specifications
UsbPot device specifications
1) Based on AD5292
2) 20k potentiometer (100k option)
3) USB controlled
4) USB powered (no other power source required)
5) 1,000V isolation
6) 1024 taps
7) 12V compliance wrt 0V pin
8) Rugged box / Bare PCB
9) Uses Windows Serial Drivers
10) Rugged Hot Pluggable – recoverable.
11) Command line or GUI supplied application
12) Windows or Linux (Command line only)
13) User programmable default wiper position
